Picture
These are another pin that are blowing up the Pintrestsphere and I couldn't help but make them! I especially loved this craft because I have a friend who lives in Indiana that loves coffee so I figured that I would surprise her with this mug in the mail! Of course it's probably not a surprise anymore... But any who... here is 


HOW TO MAKE A SHARPIE MUG

This is a great craft to do with kids, for boyfriends/husbands, maybe even a wedding present for the bride/groom from the wedding party? I don't know there are so many of these out there!! This will probably be the SHORTEST How-To ever but it's fun! :) 


STEP 1: DRAW ON YOUR MUG WITH A SHARPIE
Whatever your design is whatever color you choose, just draw it onto the mug.


STEP 2: BAKE
Bake your mug in the oven at 350 degrees for about 20 minutes. 


STEP 3: ENJOY! 
Some people say that their sharpie faded or came off after washing...after testing mine I didn't seem to have that problem...so I'm not really sure what was done differently..BUT! Here is my finished mug! 
 
Picture
When surfing the Pintrestsphere for things to try on Pintrest Intrest I came across these towels! I don't know about anyone else but I have a huge issue with my towel on my oven always falling down after doing a quick hand dry or opening up the oven to check on my food that is baking; this is probably the most annoying thing in my kitchen! I have seen these hanging towels for sale in stores before but never wanted to pay for something that I was pretty sure could be hand made, I just never had the time to make a pattern and attempt this. So you can imagine my excitement when I stumbled upon this pin WITH A PATTERN!!!! I am warning you that I have changed this design up a little bit, so if you want to end up with what the picture to the left looks like then click on the link on the picture to the original pin! :)


HOW TO MAKE A HANGING KITCHEN TOWEL


Things you will need: 
1 towel
1/2 of a yard of coordinating fabric ( you won't use the full 1/2 yard but this is just in case there is a mess up)
1 button
The first thing that you will do is, make the towel to be 6 inches wide, if it is a little bit less that is fine but it can't be bigger or it won't fit into the pattern. One thing that we didn't do before we started into this project is cut the trim off of the part that is going to go into the pattern, by doing this it will be a lot easier to pass through the sewing machine! Once you have gotten your towel ready you will pass a needle and thread through the top of the towel to give it pleated look. 
Once you have done this it is time for you to print out the pattern that is provided and cut out the fabric. We folded the fabric over so that the pattern was the exact same. Then place the two pieces with the right sides facing in. The instructions get a little bit confusing here...they imply that you need to stick the towel into the pattern and sew it in. However this makes one corner really bulking when sewing. So what should be done instead is sew the pattern around without the towel in the pattern. Hint: It makes it a lot easier if you pin the two pieces together so that they don't move. 
You will then need to sew the two pieces together. Going through it just one time will be enough because this part isn't holding anything up, just closing it up! :) Once you have sewn through the pattern you will need to turn it right side out. 


After completing that step you will need to attach the towel. All you need to do is stick the towel up about an inch into the pattern; this is so it will be sturdier to use on a daily basis. When sewing this part you need to make sure that your pleats in the towel stays, this gives it a nicer touch, you will also want to go over this part multiple times to ensure sturdiness. 
After you have attached the towel you only have one more step! Now in the directions it shows that you need to make a button hole...however in my mom's trusty jar of buttons we found an overall hood! Being that country chic seems to be the household style going on today I thought that would be a better (and easier) touch as opposed to making a button hole! You can find overall hooks at JoAnn's or Michael's and maybe even Walmart! So instead of making a button hold we wove the fabric through the overall hook and sewed on a button to match our towel! And voila! I present a Hanging Hand Towel! :) 
Have you tried the hanging hand towel? How'd yours turn out?! Let me know in the comment box below! 
 
Picture
So here is a pin that I have been wanting to try for a long time but haven't had a reason to do it... until now! I have seen a lot of reviews about this art project, some that look beautiful like the one on the left and some that look like a big mess with an ugly mud brown color...So needless to say I was a little bit nervous about starting this project and how the outcome would be.

How To Make Crayon Art on Canvas
The first thing that I did to start this project is take out all of the 96 Crayola crayons. I picked Crayola because I know that they are a good sturdy crayon, well, as sturdy as crayons can be! Plus they have the pretty and bright colors.


After I took all of the crayons out I separated the crayons based on colors. Then I put the crayons in a line from red to purple; I included every single crayon in the box so that it would be in the right shade order; my OCD came out a little bit on this project...once in the right order I removed any shades that were almost identical so that the crayons would fit onto the canvas. I also removed the wrappers from all of the crayons that I was going to use before mounting them to the canvas.

Picture
I wanted to do more than the standard melted crayon so I used some electrical tape and made a monogram. I was a little bit concerned using the tape because it kept pulling up..but I kept it on there for the sake of the project. I used Krazy Glue to mount the crayons from red to yellow...and then I ran out of Krazy Glue..so I used Sobo craft and fabric glue. This worked just as well as the Krazy Glue so I will probably just use that for the whole project next time. When I got the red, orange, and yellow crayons on I was so excited to try the project out that I started blow drying before I went digging for my craft glue! I was a little unsure of the best way to go about melting the crayons so I tried several different angles and found that the 2 best ways to melt the crayons is to hold the blow dryer either directly above the canvas or directly in front of the crayons. I also found that the crayons tend to just drip straight down instead of filling out like all of the pictures show; so I then took the blow dryer and started blowing around the wax that had melted onto the canvas. Below are pictures of my first experience melting crayons!

Sadly, the electrical tape did not work out like I had hoped...when I started working on the rest of the colors the tape was blowing off and crayon was going where I didn't want it to go so I said forget it and took the tape off. Once I did this it was a MUCH more enjoyable project to work on...If you are dying to have a part of your art blocked out I would suggest taping/gluing a paper cut out of what you want put onto the canvas instead of just using electrical tape! Below is a gallery of the rest of the project and my finished product! Overall I would say that this is a fun and easy project to do. If you are a babysitter/nanny for children around 8 and up I would definitely suggest this as a fun activity for the kids to do! It is a low mess highly creative activity for anyone!
 
Picture
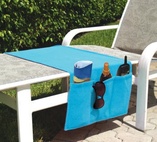
Hey Ladies and Gents! Don't you hate it when you go to the pool and your stuff ends up all over the pool? On top of the fact that you have a constant fear of setting your phone or book down somewhere with it ending up in a puddle? I know I do! Well one day, on Pintrest I came across a towel that drapes over the seat part of your pool chair  and it had POCKETS! So the first thing that I thought was I have to have this! One thing that you will soon learn about me is that anything with pockets, I MUST own! I love pockets! I think they're so handy! Sadly, the pin I found was what I call a "Trickery Pin"...What a trickery pin is, is a pin that shows something made out of household materials and says "DIY!" in the caption, but in reality it is just a link to go buy that item...man I can't stand trickery pins...So just for you DIYers I created a "How-To" so that you can make this handy pool item yourself! However, if you just like this and don't want to take the time to make one of your own I have attached the link to the site to buy them to this picture above. These are so handy! They will hold you suntan lotion, phone, mp3 player, book/magazines, snacks, sun glasses, etc.

                                                                        How-To Pool Pocket Towel

Picture
1. First and most obviously, you need to find a towel. One that you don't
absolutely love and one that is a little bit thinner than your other towels. The
towel that I used came up to about my neck, I'm 5' 7.5" to give you an
indication of length.  


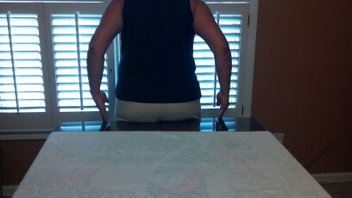
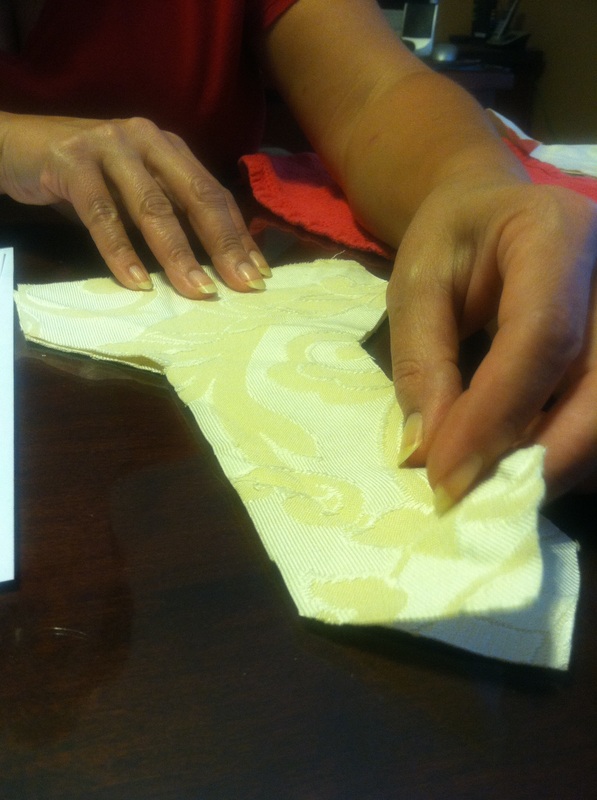
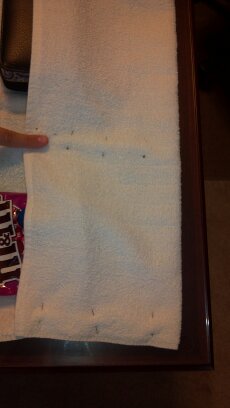
2. To start, I laid the towel out on the desk at my mom's
house and determined about how wide a lounge chair is and lined it up with the
center of the towel. As seen above. I then pinned the spot where the lounge chair would be as a reference point

Picture
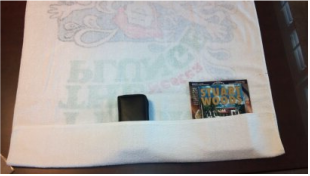
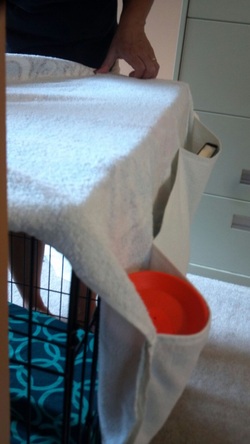
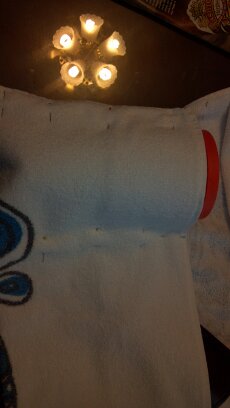
3. I picked some of the things that I wanted my pocket towel to be able to hold so I could judge where to pin the pockets. If you look at the picture you can see that I have the magazine standing up, however, when I tested it I decided to resize the pockets so that the magazine could lay sideways, this worked much better! Also, as you can see I originally had very shallow pockets, but my mom pointed out to fold the towel up so that the pockets started just below where the edge of the lounge chair was. And it's suggestions like that that I keep my mom around!

Picture
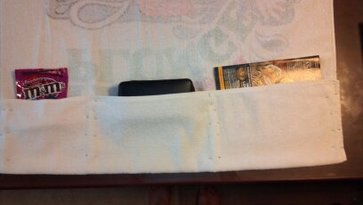
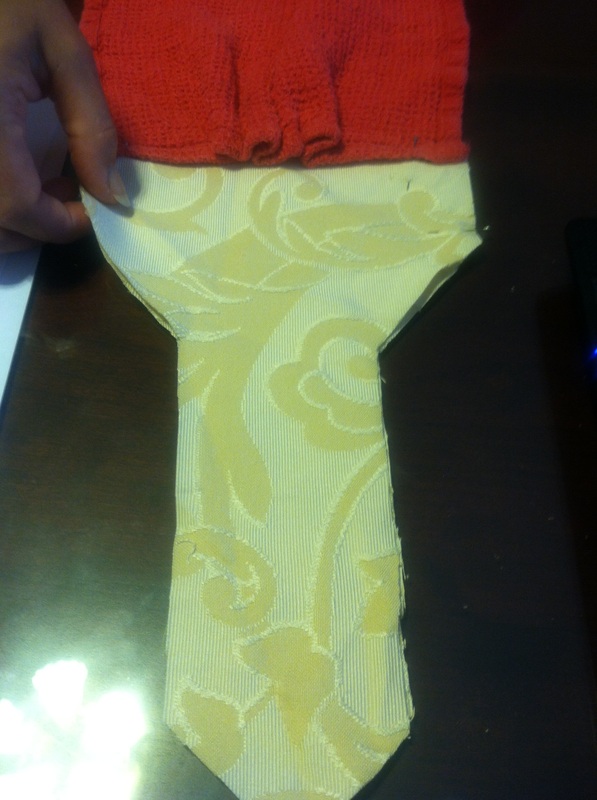
***To the right is a picture or the towel when it is pinned with the magazine now laying on it's side and the pockets have been made deeper.***

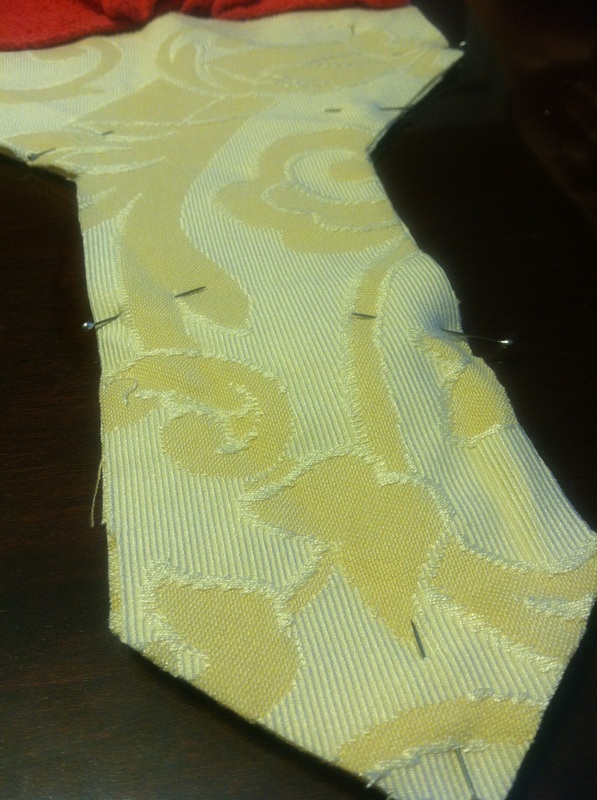
***The pictures below show more of the pinning of the pockets, including how to pin for a water bottle pocket.***

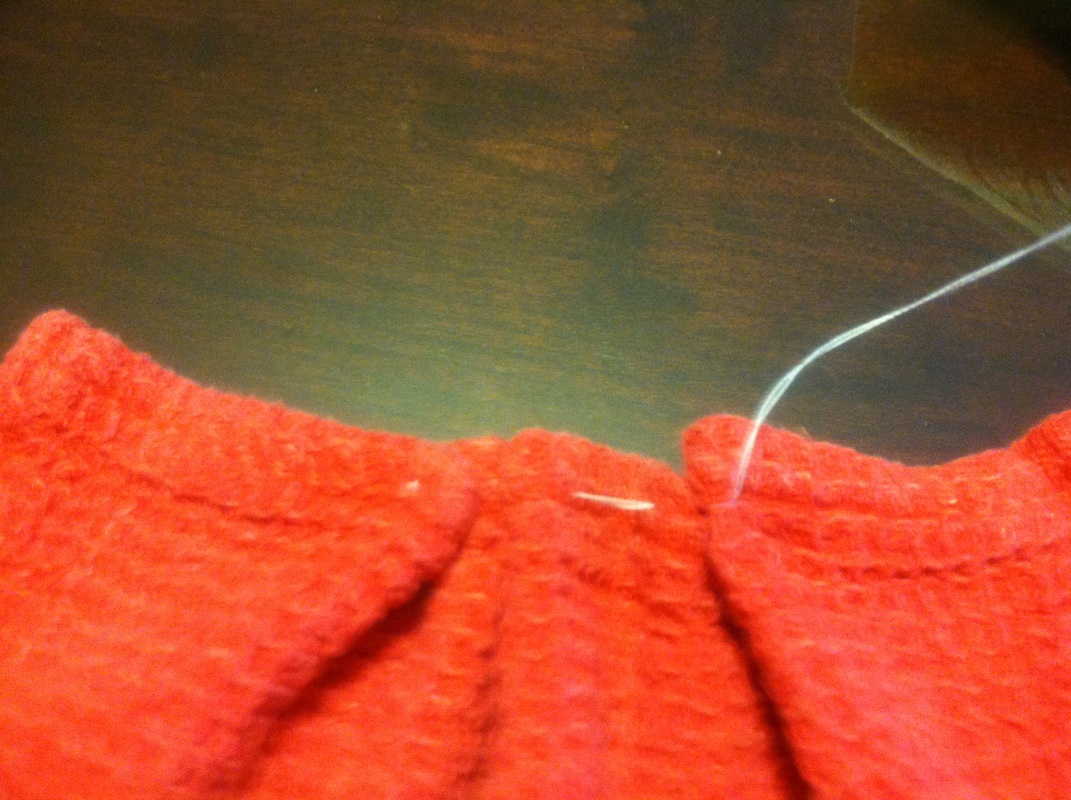
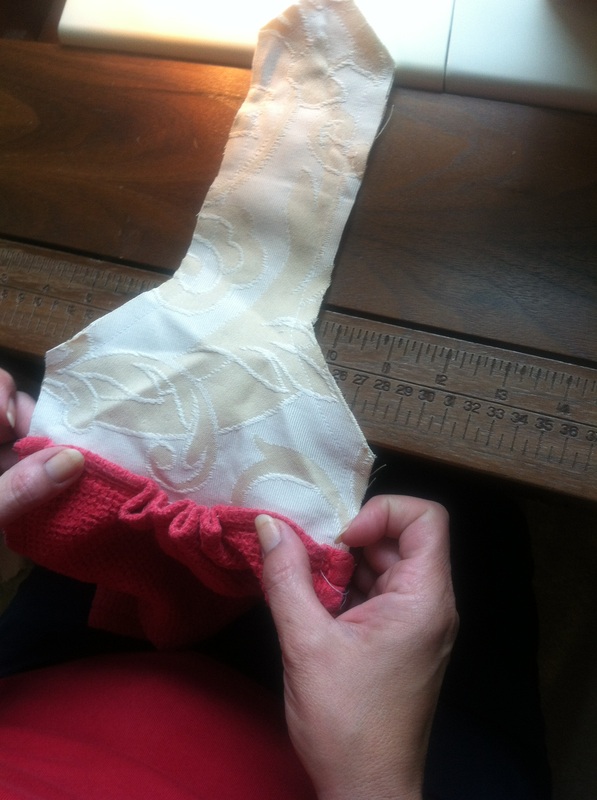
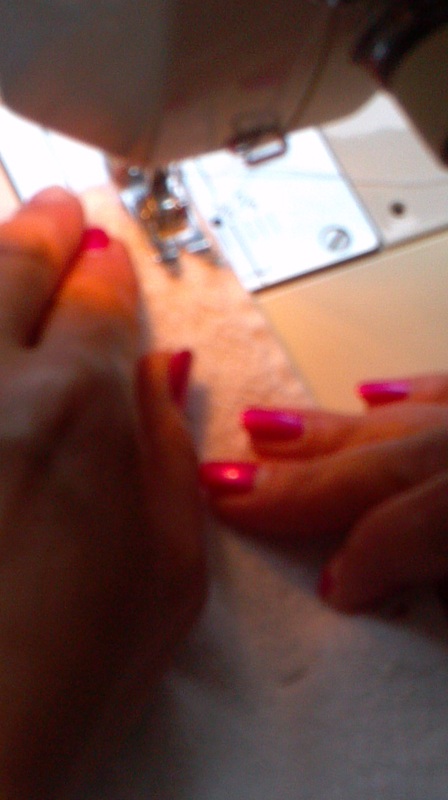
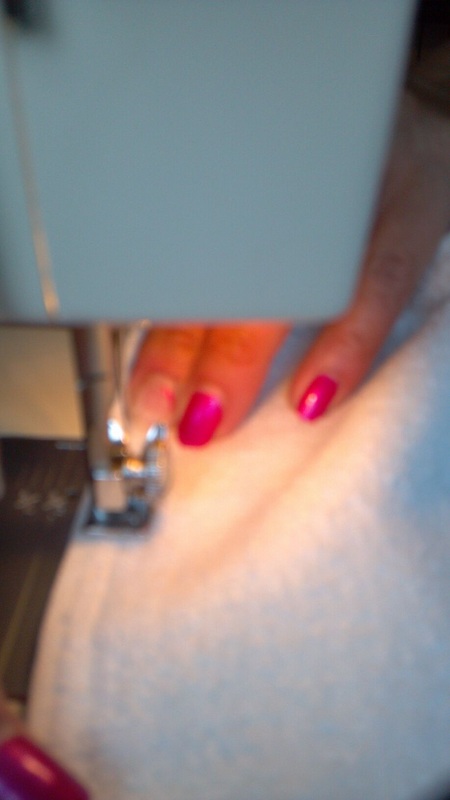
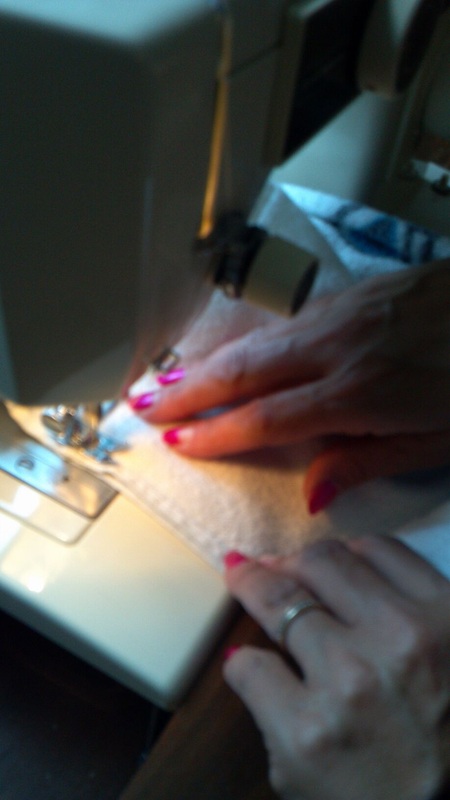
4. Once the pinning was finished it was time for mom to step in! We used white
thread since it was a white towel. She did a straight stitch. To make the
pockets stronger she did a double stitch, meaning that once she sewed down the
pocket once she turned the fabric around and sewed back up the pocket.
Picture
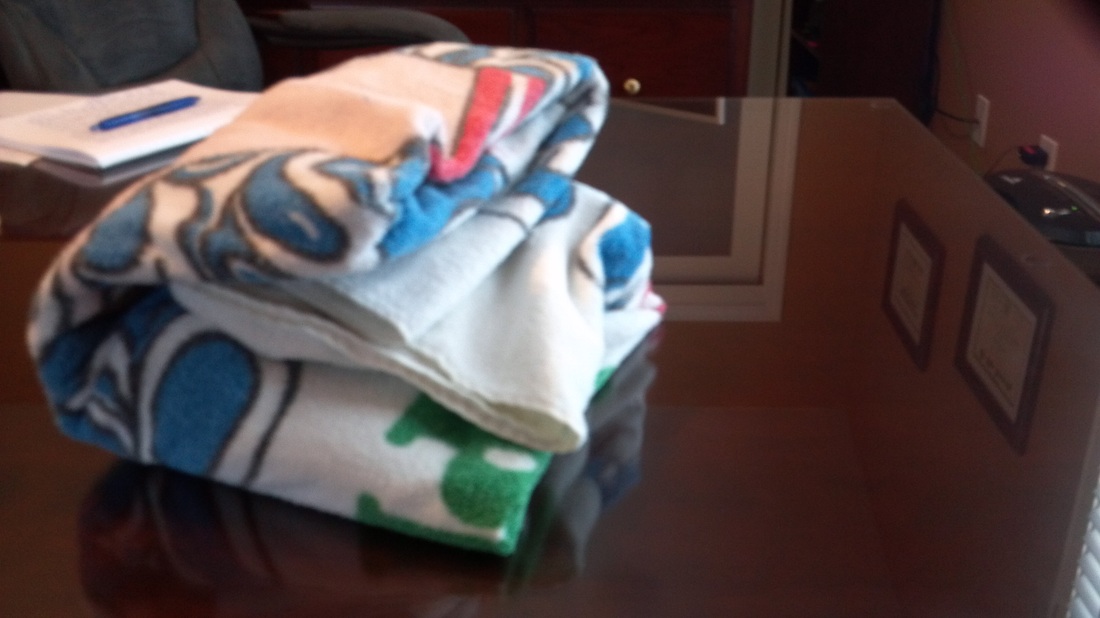
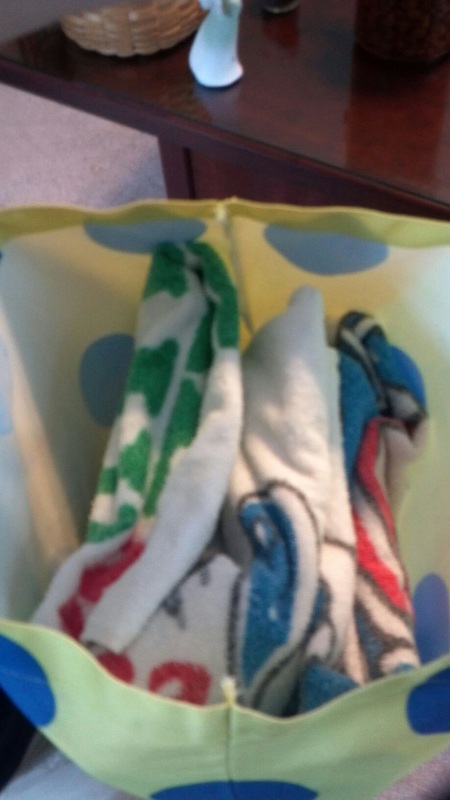
Once all of the sewing is done you can test out the pockets to make sure that they work to your liking. And voila! You have your very own pool pocket towel!

**Additional options: We left our pool pocket towel with the edges unbinded, however, you can bind them with the sewing machine or by buying binding fabric.***

**Another nice thing about this towel is that you can put everything that you are taking to the pool and fold the towel up and stick it in your beach bag with your regular towel and everything is neat and organized!**