I'm sorry to say that this will be a pictureless post.. :(
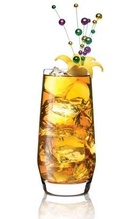
This is a drink that my mom has always made that is SOO Delicious it isn't on Pintrest yet! It is called a Sneaky Pete! This is a very simple drink to make but MUST BE MADE IN ADVANCE!!! Again this is a drink for those of legal drinking age...sorry!! 


How To Make Sneaky Pete's
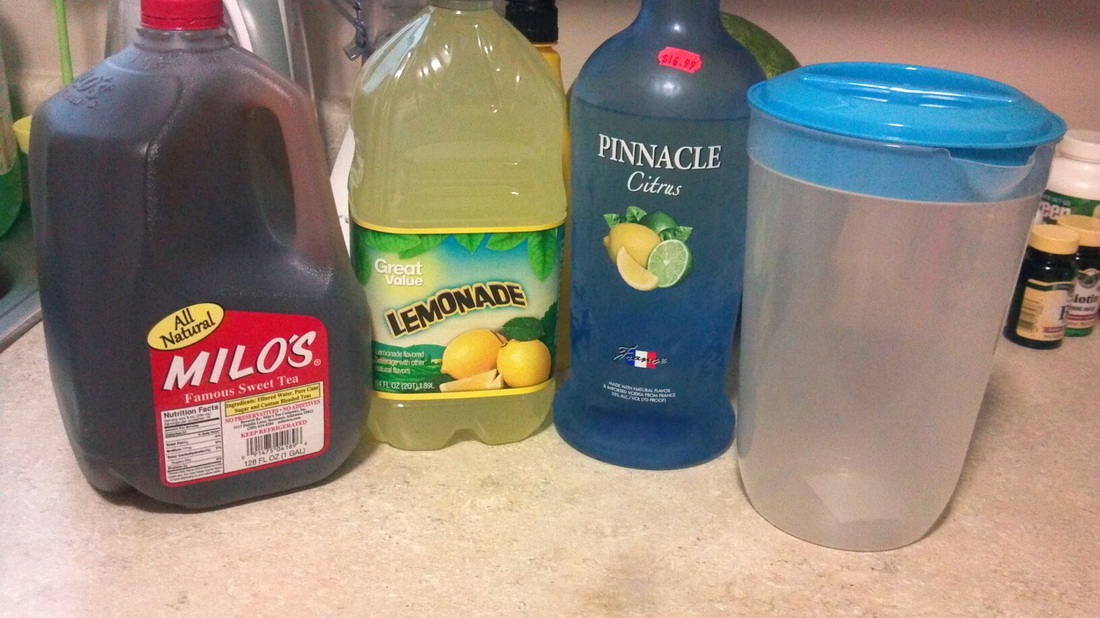
What You'll Need:
1 32 oz. bottle of Hawaiian Punch
1 can of Frozen Orange Juice concentrate
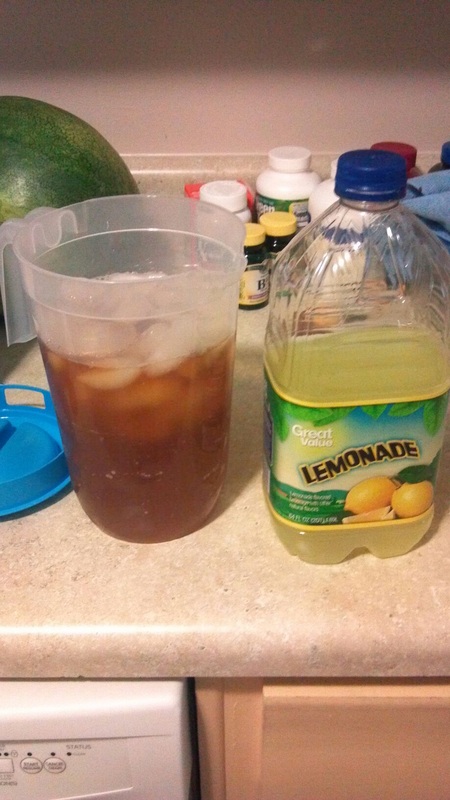
1 can of Frozen Lemonade concentrate
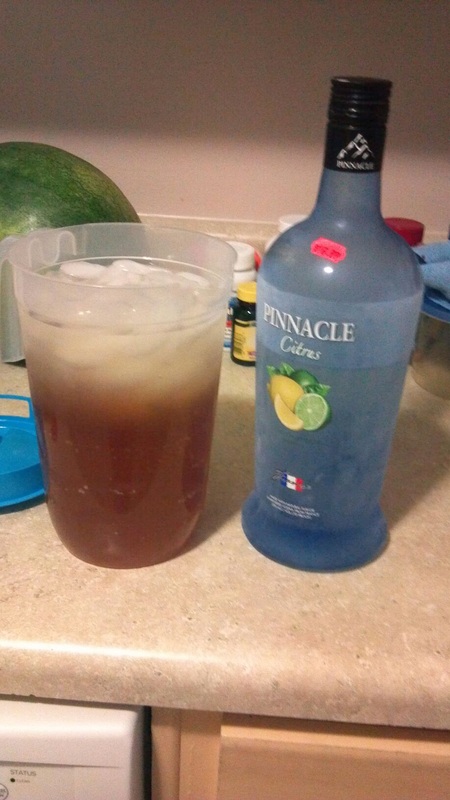
1 handle of Rum (any brand is fine, just don't do flavored)
1 12 pack of Mountain Dew/Sun Drop/7 UP/Sprite

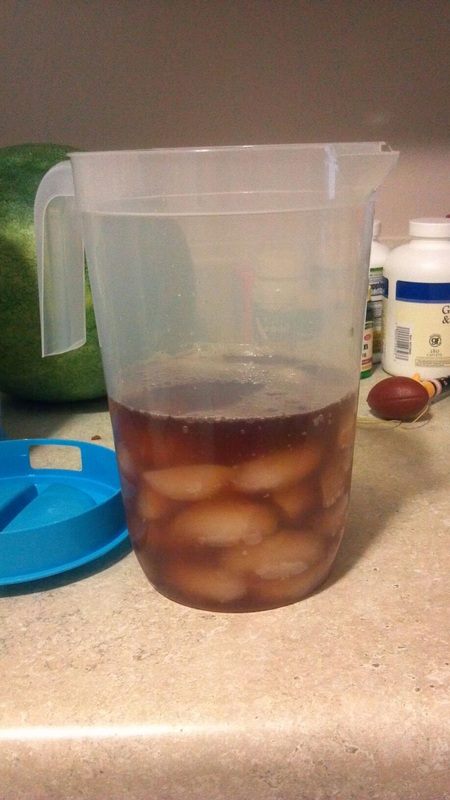
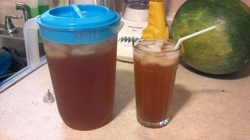
This drink is very easy to make. All you have to do is mix all of the ingredients together in a large bowl. Once you have done that you will either put everything into a a container to scoop into glasses later OR you can put a small amount into various mason jars. When you are done putting the Sneaky Pete's in the container of your choice place the container(s) in the freezer. You need to leave the Sneaky Pete's in the freeze over night at a minimum, they will freeze. After 24 hours or more take the Sneaky Pete's out of the freezer and if you have put all into one container scoop about 4 Tablespoons into a glass; if not pull out a mason jar and add 1 can of your citrus soda of choice. Stir the soda up so that there isn't a big glob of Sneaky Pete's at the bottom of the glass and enjoy! :)
 
Picture
These are another pin that are blowing up the Pintrestsphere and I couldn't help but make them! I especially loved this craft because I have a friend who lives in Indiana that loves coffee so I figured that I would surprise her with this mug in the mail! Of course it's probably not a surprise anymore... But any who... here is 


HOW TO MAKE A SHARPIE MUG

This is a great craft to do with kids, for boyfriends/husbands, maybe even a wedding present for the bride/groom from the wedding party? I don't know there are so many of these out there!! This will probably be the SHORTEST How-To ever but it's fun! :) 


STEP 1: DRAW ON YOUR MUG WITH A SHARPIE
Whatever your design is whatever color you choose, just draw it onto the mug.


STEP 2: BAKE
Bake your mug in the oven at 350 degrees for about 20 minutes. 


STEP 3: ENJOY! 
Some people say that their sharpie faded or came off after washing...after testing mine I didn't seem to have that problem...so I'm not really sure what was done differently..BUT! Here is my finished mug! 
 
Picture
Egg white face masks seem to be the latest and greatest in beauty tips today. If you go onto the "Hair and Beauty" tab of Pinterest most of the pins are of the egg white face mask. With this many people attempting it and pinning about it it must be a good idea! So I've decided to try it! I am making up my own recipe for the mask using things that I think will work well...we shall see! 


What You'll Need:
1 egg (whites only..duh)
1 Tablespoon of honey
1 Tablespoon of Cinnamon


Picture
Once you have stirred the ingredients together it is time to apply the mask. I don't like to touch the egg mixture to I decided to use cotton balls to apply and it seemed to be a lot easier, cleaner, and I didn't have to touch the slime! All you do is apply a thin layer to your whole face avoiding the eye and mouth area. 

WARNING IT IS BEST TO DO THIS MASK WHEN NO ONE IS HOME...OR YOU WILL BE MADE FUN OF BY EVIL BOYFRIEND... :(


After about 5 minutes rinse the mask off with warm water. The cinnamon will work as a light exfoliate so when rinsing rub in a circular motion. The result? At first your face will look a little bit red and splotchy but after about 3 minutes you will see a clearer face with small pores and noticeably softer skin! :)

 
Picture
When surfing the Pintrestsphere for things to try on Pintrest Intrest I came across these towels! I don't know about anyone else but I have a huge issue with my towel on my oven always falling down after doing a quick hand dry or opening up the oven to check on my food that is baking; this is probably the most annoying thing in my kitchen! I have seen these hanging towels for sale in stores before but never wanted to pay for something that I was pretty sure could be hand made, I just never had the time to make a pattern and attempt this. So you can imagine my excitement when I stumbled upon this pin WITH A PATTERN!!!! I am warning you that I have changed this design up a little bit, so if you want to end up with what the picture to the left looks like then click on the link on the picture to the original pin! :)


HOW TO MAKE A HANGING KITCHEN TOWEL


Things you will need: 
1 towel
1/2 of a yard of coordinating fabric ( you won't use the full 1/2 yard but this is just in case there is a mess up)
1 button
The first thing that you will do is, make the towel to be 6 inches wide, if it is a little bit less that is fine but it can't be bigger or it won't fit into the pattern. One thing that we didn't do before we started into this project is cut the trim off of the part that is going to go into the pattern, by doing this it will be a lot easier to pass through the sewing machine! Once you have gotten your towel ready you will pass a needle and thread through the top of the towel to give it pleated look. 
Once you have done this it is time for you to print out the pattern that is provided and cut out the fabric. We folded the fabric over so that the pattern was the exact same. Then place the two pieces with the right sides facing in. The instructions get a little bit confusing here...they imply that you need to stick the towel into the pattern and sew it in. However this makes one corner really bulking when sewing. So what should be done instead is sew the pattern around without the towel in the pattern. Hint: It makes it a lot easier if you pin the two pieces together so that they don't move. 
You will then need to sew the two pieces together. Going through it just one time will be enough because this part isn't holding anything up, just closing it up! :) Once you have sewn through the pattern you will need to turn it right side out. 


After completing that step you will need to attach the towel. All you need to do is stick the towel up about an inch into the pattern; this is so it will be sturdier to use on a daily basis. When sewing this part you need to make sure that your pleats in the towel stays, this gives it a nicer touch, you will also want to go over this part multiple times to ensure sturdiness. 
After you have attached the towel you only have one more step! Now in the directions it shows that you need to make a button hole...however in my mom's trusty jar of buttons we found an overall hood! Being that country chic seems to be the household style going on today I thought that would be a better (and easier) touch as opposed to making a button hole! You can find overall hooks at JoAnn's or Michael's and maybe even Walmart! So instead of making a button hold we wove the fabric through the overall hook and sewed on a button to match our towel! And voila! I present a Hanging Hand Towel! :) 
Have you tried the hanging hand towel? How'd yours turn out?! Let me know in the comment box below! 
 
Picture
I am going to start this post off by apologizing for the lack of pictures on this blog. I couldn't take them while working out but I can definitely give you a review of this workout! 


By far this is a daunting task of a workout! Just looking at it makes you break a sweat, and makes others feel like it's just about impossible! Well let me tell you that it isn't impossible, but it is by far the hardest workout I have ever done. If you are looking to get into shape then this is definitely a workout that you will want to incorporate into your weekly workout! After the first set I was sweating and breathing heavy...of course I'm not in the best shape of my life...but even people who are in tip top shape should be breathing heavy by the third set! 


I did this workout by taking 30 second breaks in between the jumping jacks, crunches, wall sit, leg lifts and push ups and then I took a 1 minute break in between the sets. Instead of doing an 11 minute run I did an 11 minute walk around my neighborhood which was one lap for me so it worked out well! Like the bottom line says, you will feel invincible after completing this workout! 

 
Picture
So I realized the other day that 1. I haven't blogged in about 18 million years! So to anyone who is reading this blog regularly I am very sorry! and 2. I have yet to do a recipe blog post! But that changes today, because I am bringing to you all the Banana Pudding Cake. I was inspired to look up this recipe on Pintrest when my boyfriend's brother and sister started talking about banana pudding and how they haven't had it in forever so I wanted to be able to make something for the next time we're all together to take them back to their childhood! :) 
As always the link to the original pin is attached to the picture.
HOW TO MAKE BANANA PUDDING CAKE

What You'll Need:
1 box Yellow Cake Mix
2 boxes Banana instant pudding
1 tub of Whipped cream
About 20 vanilla wafers
1 banana ( if you want to garnish, which I did not)


This cake is by far one of the easiest cakes that I have ever made. I have heard a lot of people in the past talk about how they are afraid to do poke hole cakes with pudding because they don't think anything will absorb into the cake like it does with Jello poke hole cakes, well let me tell you that you do not have to worry about this cake! It does exactly as promised leaving just a small layer on top that actually look intentional! 


STEP 1: BAKE THE CAKE

This step is pretty self-explanatory you will just follow the instructions on the box and bake it into a 9x13 pan.

STEP 2: POKE HOLES IN THE CAKE
Shortly after the cake comes out of the oven you will take the end of a wooden spoon and poke holes in the cake, make sure that you poke several holes throughout the entire cake. 

STEP 3: MAKE THE PUDDING
Again all that is going on is you will follow the instructions on the back of the pudding box. I made both boxes at one time while others may want to do one box at a time if they want less pudding to go into the cake.


STEP 4: POUR THE PUDDING ON THE CAKE
The next step is also pretty self-explanatory, you're just going to do exactly what it says to do, pour the pudding on the cake! 


STEP 5: TOP WITH WHIPPED CREAM AND COOKIES AND REFRIGERATE
I mean come on, how easy is this cake?!

The best and final step of this cake is to eat it and enjoy! Let it take you back to the summer days as a child eating banana pudding. My taste tester Steven happened to love this cake! 
 
Have you tried this cake? Do you have your own version of the poke hole cake that you want to share? Let me know!
 
Picture
This week's posts are going to be a little bit out of order so bear with me! For our sewing tutorial of the week we are making a tote! You can never have enough totes and this one is GINORMOUS! So it is perfect for the beach/pool! (Hint: to go with this awesome sauce tote check out the pool pocket towel aka my first post!)

This website had very good instructions for making this bag and I think that our bag turned out great! However, we DID make some changes so if you would like to learn how to make an AWESOME tote that is big but has longer straps than the one in the picture on the left then keep reading! :)


HOW TO MAKE AN AWESOME BIG TOTE

What you will need: 

2 pieces of fabric 24" x 21.5" or 1 piece 48" x 21.5" (to be folded over) for the bag
2 pieces of fabric 47" x 3.25" for the straps

2 pieced of Pre-Cut interfacing 1.5" wide

My mom and I decided to cut 1 big piece of fabric and fold it over instead of worrying about pinning and having 3 edges to line up! :) 
Once you have lined up your edges (Right sides facing each other, basically the bag will be inside out once you have sewn the edges)  sew either the two sides of the big piece or the two sides and whichever side you want to be your bottom piece.
Picture
The next step was a little bit confusing when I first read it, but basically what you are doing is, with the bag still turned inside out, going to the bottom corners and measuring out triangles in each corner, we measured 5" wide and 2" deep into the bag. What you are going to do is mark wherever you want the triangle to stop and then sew a straight stitch across. We decided to double stitch this for sturdiness because you are essentially making the bottom of the bag. We pinned the pins down the opposite direction of how the original pin has them done so that we were able to sew right over them with the sewing machine. We also pinned down the extra fabric from the seem as you can see in the picture so that the extra fabric is flat on each side instead of all to one side. 

Once you have sewn both sides of the bottom of the bag you are almost done with the body! YAAYY!! :) 

It's now time to move onto the straps! This original post did not mention whether or not they used interfacing so I am assuming that they did not, well...we did. To make the straps, cut a piece of fabric the length that you would want them, and width of 3.25 inches. 

Fold over about 1/8 of an inch onto the interfacing on each side and iron until there is a crease so that your raw edges will be hidden. 

Once you have a crease on each side, fold the strap, with interface inside, in half so that none of the interfacing is showing and iron to have a finished look. (Hint: If you can have an extra hand to push the iron along for you it makes the process a lot easier!) You will still have one open side to your strap so you will need to pin and go over to the sewing machine and close up the strap with a doubled straight stitch. Once you have done that your straps are complete! 


                         **Below is a gallery of step by step how to do the straps**
Picture
                                                Only two steps left!!! 

The next step to this bag is to create a finished edge at the top of the bag. All you have to do for this is fold down the raw edge at the top of the bag, pin it down where you want it, and sew!


Once you have created a finished edge for the top of your bag you are ready to complete the FINAL STEP!! :) Attaching the straps is the last step, to attach them, measure out how far down you want the bag to hit you by holding the bag up to you with the straps. Once you have got your bag at a comfortable length pin them to the inside of the bag and sew them on, my mom decided to sew all the way around the strap so that it was like a square for added support. 


When you have sewn on your straps you have finished your bag! Turn it right side in and check it out! You're ready to go to the pool!

Questions? Comments? Concerns? Let me hear them! :) Don't forget! If you have a Pin that you want me to try out or have one that you've tried and want me and everyone else to know about it check out the "Suggested Pinsperiments" and "Pinsperiments From You" pages!
 
Picture
We have all seen the workouts on Pintrest and
 wondered how effective is this
ACTUALLY going to be? The first workout that I
 thought actually looked like it
may be challenging was the "300 Abs Workout"
 promising to give you the abs of
the men in 300. Now ladies, I know that while those
abs look nice it's
not our ideal body image which is why this post is
dedicated to the men of
Pintrest! The video below is demonstrating how the
moves are to be done and the
effectiveness of the workout!
Enjoy!

 
Picture
Hello ladies and gents! I don't know about you but I LOVE Arnold Palmers! I think that they
are one of the most refreshing drinks you can have on a summer day with a mix of
sweet tea and lemonade. For my first drink recipe I wanted to find something
that is refreshing for summertime and something that I have never tried before!
:)  As always, to see the original pin click on the picture. The sad part about this pin is that when you go to the link there are no reviews on how it tastes, it just shows the recipe and it's up to you to determine whether or not to test it out. Well that is a problem no more! I'm always here to help out so if you love Arnold Palmers as much as I do and you want to know how this drink tastes keep on reading!
 
How To make Fat Tuesday Iced Tea

The recipe of the original pin gives the measurements for just one drink, but I never drink alone! So I adjusted the recipe to serve about 10 people. To start off you will need the following items; sweet tea, lemonade, and any type of Citrus vodka, I used Pinnacle Citrus; as shown below.
The steps are probably the easiest of all drinks I've ever made! All you do is combine the three ingredients! I decided to layer the drinks as follows: sweet tea, then vodka, then lemonade. Because I'm Italian I guesstimated on the measurements until the combination tasted good; however if you are a stickler on measurements the easiest thing to do is multiply the original measurements by 10 (ORIGINAL RECIPE CALLED FOR: 2 oz. Citrus Vodka, 1 oz. Lemonade, and 3 oz. Sweet Tea) I also added ice to the pitcher to get the Fat Tuesday Iced Tea cold as quickly as possible for taste testing!
Picture
AND THE VERDICT IS IN!!
If you are a fan of Arnold Palmers, Sweet Tea, or Lemonade then you will LOVE this drink! It is the perfect summertime refreshment on those hot afternoons! Be careful though! It is so tasty that this drink has the capability of sneaking up on you!

***DISCLAIMER***
Alcoholic beverages are to be consumed by those of legal age, if you are not of legal drinking age then leave
out the alcohol and just enjoy the classic Arnold Palmer! Your time will come to
add the kick, until then enjoy the simple things! :)
 
Picture
So here is a pin that I have been wanting to try for a long time but haven't had a reason to do it... until now! I have seen a lot of reviews about this art project, some that look beautiful like the one on the left and some that look like a big mess with an ugly mud brown color...So needless to say I was a little bit nervous about starting this project and how the outcome would be.

How To Make Crayon Art on Canvas
The first thing that I did to start this project is take out all of the 96 Crayola crayons. I picked Crayola because I know that they are a good sturdy crayon, well, as sturdy as crayons can be! Plus they have the pretty and bright colors.


After I took all of the crayons out I separated the crayons based on colors. Then I put the crayons in a line from red to purple; I included every single crayon in the box so that it would be in the right shade order; my OCD came out a little bit on this project...once in the right order I removed any shades that were almost identical so that the crayons would fit onto the canvas. I also removed the wrappers from all of the crayons that I was going to use before mounting them to the canvas.

Picture
I wanted to do more than the standard melted crayon so I used some electrical tape and made a monogram. I was a little bit concerned using the tape because it kept pulling up..but I kept it on there for the sake of the project. I used Krazy Glue to mount the crayons from red to yellow...and then I ran out of Krazy Glue..so I used Sobo craft and fabric glue. This worked just as well as the Krazy Glue so I will probably just use that for the whole project next time. When I got the red, orange, and yellow crayons on I was so excited to try the project out that I started blow drying before I went digging for my craft glue! I was a little unsure of the best way to go about melting the crayons so I tried several different angles and found that the 2 best ways to melt the crayons is to hold the blow dryer either directly above the canvas or directly in front of the crayons. I also found that the crayons tend to just drip straight down instead of filling out like all of the pictures show; so I then took the blow dryer and started blowing around the wax that had melted onto the canvas. Below are pictures of my first experience melting crayons!

Sadly, the electrical tape did not work out like I had hoped...when I started working on the rest of the colors the tape was blowing off and crayon was going where I didn't want it to go so I said forget it and took the tape off. Once I did this it was a MUCH more enjoyable project to work on...If you are dying to have a part of your art blocked out I would suggest taping/gluing a paper cut out of what you want put onto the canvas instead of just using electrical tape! Below is a gallery of the rest of the project and my finished product! Overall I would say that this is a fun and easy project to do. If you are a babysitter/nanny for children around 8 and up I would definitely suggest this as a fun activity for the kids to do! It is a low mess highly creative activity for anyone!